How to Maintain Your Klipper Configuration
Based on what I see on Discord, Reddit, and the many forums out there, I would say that the vast majority of Klipper configurations are in an untracked state. The remaining minority consists of some mix of users who are preserving their configurations via some compressed format, I know that some are even backing up the entire Klipper host image. And those who are properly tracking their configurations with git, a very small minority.
What is the purpose of this blog post?
This is not a git tutorial. My purpose is to provide you with the absolute minimum to track your Klipper configuration with git.
What is git?
Git is a distributed version control system that tracks versions of files. It is often used to control source code by programmers collaboratively developing software. - Wikipedia
In short (and I’m being very short here because git is not akin to a screwdriver or a hammer, it’s more like an aircraft carrier, an extremely powerful and complex thing), git lets you track changes in your files, large and small (as small as an extra whitespace character in one of your files).
Why is tracking changes in your Klipper configuration important?
In the past, and I’m talking about the Marlin era here, your firmware settings were enclosed “within” your printer. If you needed to make changes, you had to usually use a dial of some kind attached to your printers interface. Others using Octoprint could type commands in the console, but again, your settings were “enclosed” within the printer. If your Octoprint host was down, you didn’t have to worry about your settings, and could print issue free via the printer’s default interface.
In this Klipper era, however, a part of your printer, the printer settings, “live” inside your Klipper host (your Orange Pi, old laptop, etc). And as we all know, storage devices break down, get corrupted, especially storage devices such as SD cards, a crucial part of many of our Klipper hosts.
Furthermore, git let’s your track the history of your files, the changes you made. So, in case you bugger up your configuration, you can always revert back to previous states of the config very easily. This is beyond the scope of the blog post, unfortunately.
How to track your Klipper configuration with git
It’s fairly straight forward, for our use case at the least. I have a slightly more, but less verbose, git tutorial found here. What you find on this blog post, however, will more than suffice.
1. First step is to ssh into your Klipper host.
ssh [email protected]
2. Navigate to your Klipper configuration directory
cd ~/printer_data/config
3. Initial the git repo.
git init
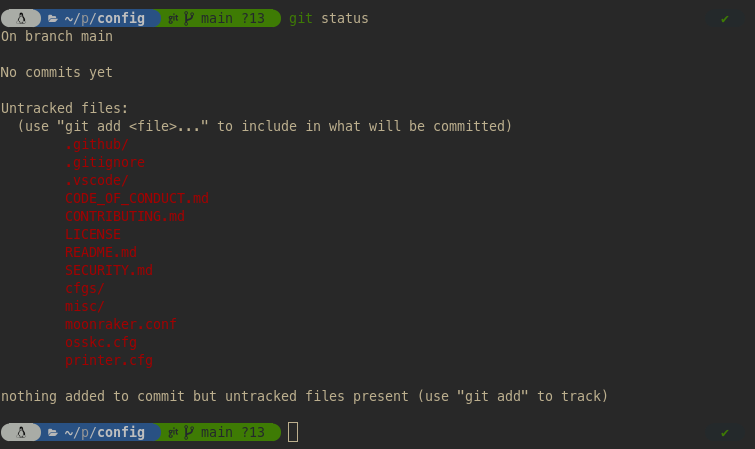
You can check the status of your repo via git status. Note that once you’re up and running with git, you’ll often be checking the status of your Klipper configuration.
git status
Output
Your output will be different, but that’s unimportant.
4. Create a .gitignore
You want git to ignore, not track, certain files and folders, because they might not have anything to do with your Klipper configuration, but need to be, for one reason or another, inside your Klipper configuration folder. These “extra” files can also make it more difficult to see at a glance if your repository needs maintenance, that is, whether you need to “commit” some changes (more on “commits” shortly). Temporary backups created by Klipper fit into this category of “extra” files.
Here’s a good starting point for a .gitignore. We are going to append the echoed filenames to .gitignore (it will be created if it doesn’t exist).
echo "printer-*_*.cfg" >> .gitignore
echo ".moonraker.conf.bkp" >> .gitignore
5. Add files to track
The simplest Klipper configuration will only consist of the printer.cfg file. Others, such as mine, consist of many files and folders that are all crucial parts of the configuration.
I’m going to tell git to track the following:
printer.cfgosskc.cfgmoonraker.conf.gitignorecfgsfolder
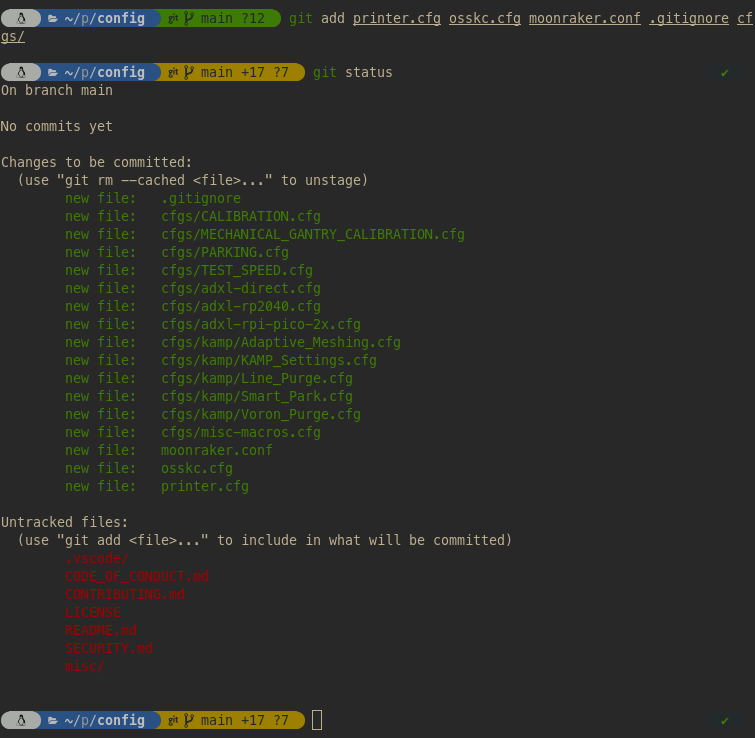
git add printer.cfg osskc.cfg moonraker.conf cfgs/
Let’s check the status of the repo again.
Output
What is the staging area?
Before you commit changes, you must add those changes to the staging area.
What you see in green above are the “changes” that are in the “staging area”. Note that a change isn’t necessarily a file, it could be something as small as a period (”.”) added to a file, while other changes to that same file have not been “staged”, meaning you don’t want to “save” them.
The red section contains files and folders (as well as other changes) that are not staged, and we don’t want to stage them. Since there are several files and folders that are unnecessary for the configuration, let’s add them to our .gitignore. We don’t care to track these files nor any changes that might occur in them.
echo ".vscode/" >> .gitignore
echo "CODE_OF_CONDUCT.md" >> .gitignore
echo "CONTRIBUTING.md" >> .gitignore
echo "LICENSE" >> .gitignore
echo "README.md" >> .gitignore
echo "SECURITY.md" >> .gitignore
echo "misc/" >> .gitignore
Let’s check the status of the repo again.
Output
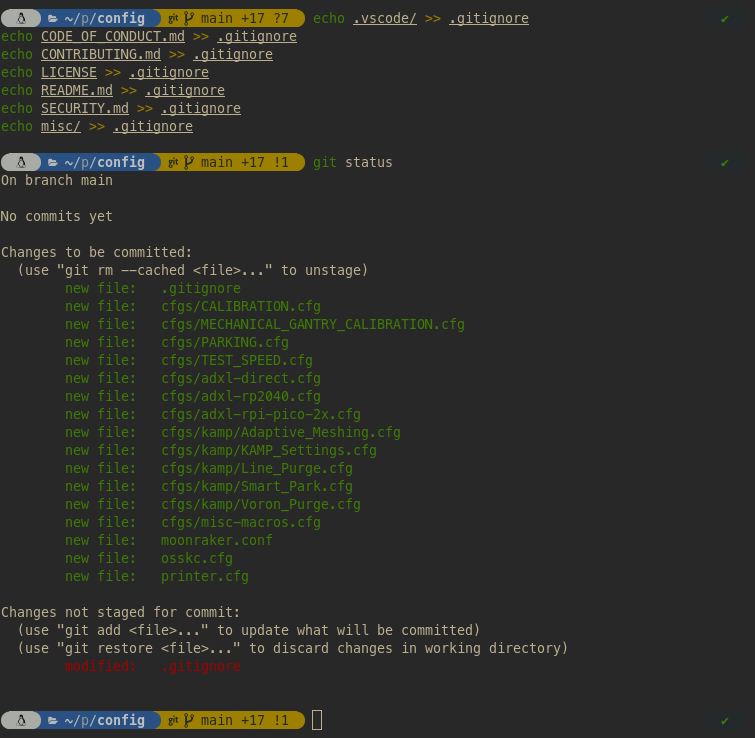
As you can see, the files and folders that we have added to .gitignore are no longer showing up in the section Changes not staged for commit, because they are being ignored. However, .gitignore is now in that section. This is the power of git! Since .gitignore was modified due to our echos above, git noticed this and is letting us know.
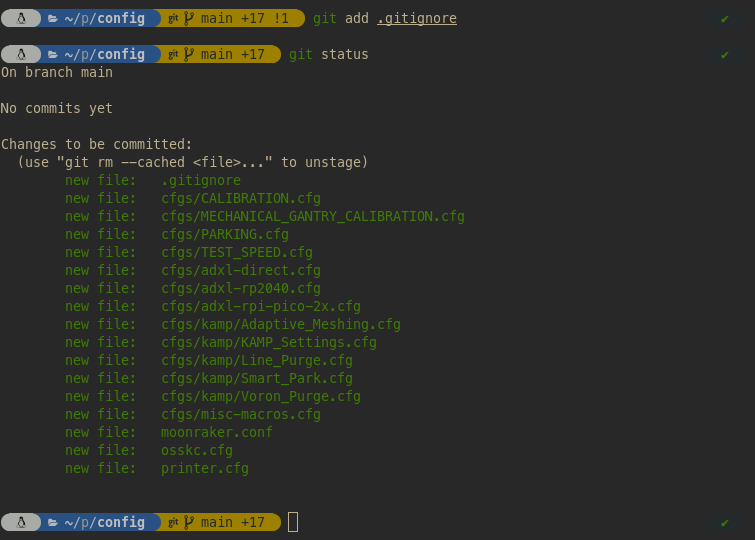
Why don’t you try adding .gitignore to the staging area yourself?
Click for solution
git add .gitignore
Output
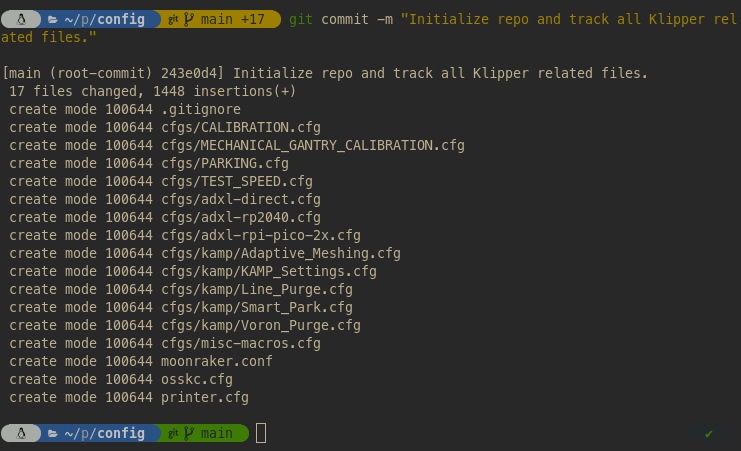
6. Commit the changes to the repo
Everything that we want to be added to the repo, to be “committed”, is in the staging area. Time to commit!
git commit -m "Initialize repo and track all Klipper related files."
Output
7. Check the repo status and the log
Status
git status
Output

Log
git log
# press q to exit the log
Output

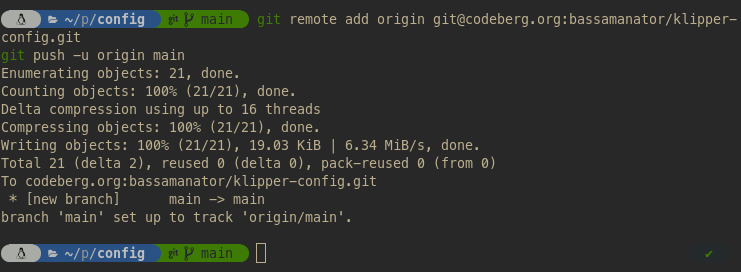
8. Push repo to the ‘cloud’
What is the ‘cloud’? For our purposes, the cloud is simply remote storage.
Create a free account at https://codeberg.org, https://gitlab.com/, or any other code storage platform of your choice. Create an new empty repository (don’t add any README.mds, etc.). You will be shown by that platform how to push your repo, but it will be along the lines of:
git remote add origin [email protected]:bassamanator/klipper-config.git
git push -u origin main
Output
Going forward
Every time you change printer settings, you want to
- add them to the staging area
- commit those changes
- push them to the cloud.
Here are some printer setting changes examples:
- create a new bed mesh
- adjust stepper motor currents
- add a new macro
- etc.
Because I don’t want this post to get more complicated than it already is, I will simply say that you should get your configuration looking the way you want to, and then commit it to the repository.
Conclusion
Git is a powerful tool, and I scratched only the surface of what this tool can do. But I hope this gets you started, and makes you interested enough to explore more on your own.
Thanks for reading!